- Initiate Email Forwarding Configuration
- First, navigate to the email settings by selecting “See all settings” in the top right corner of your email interface.
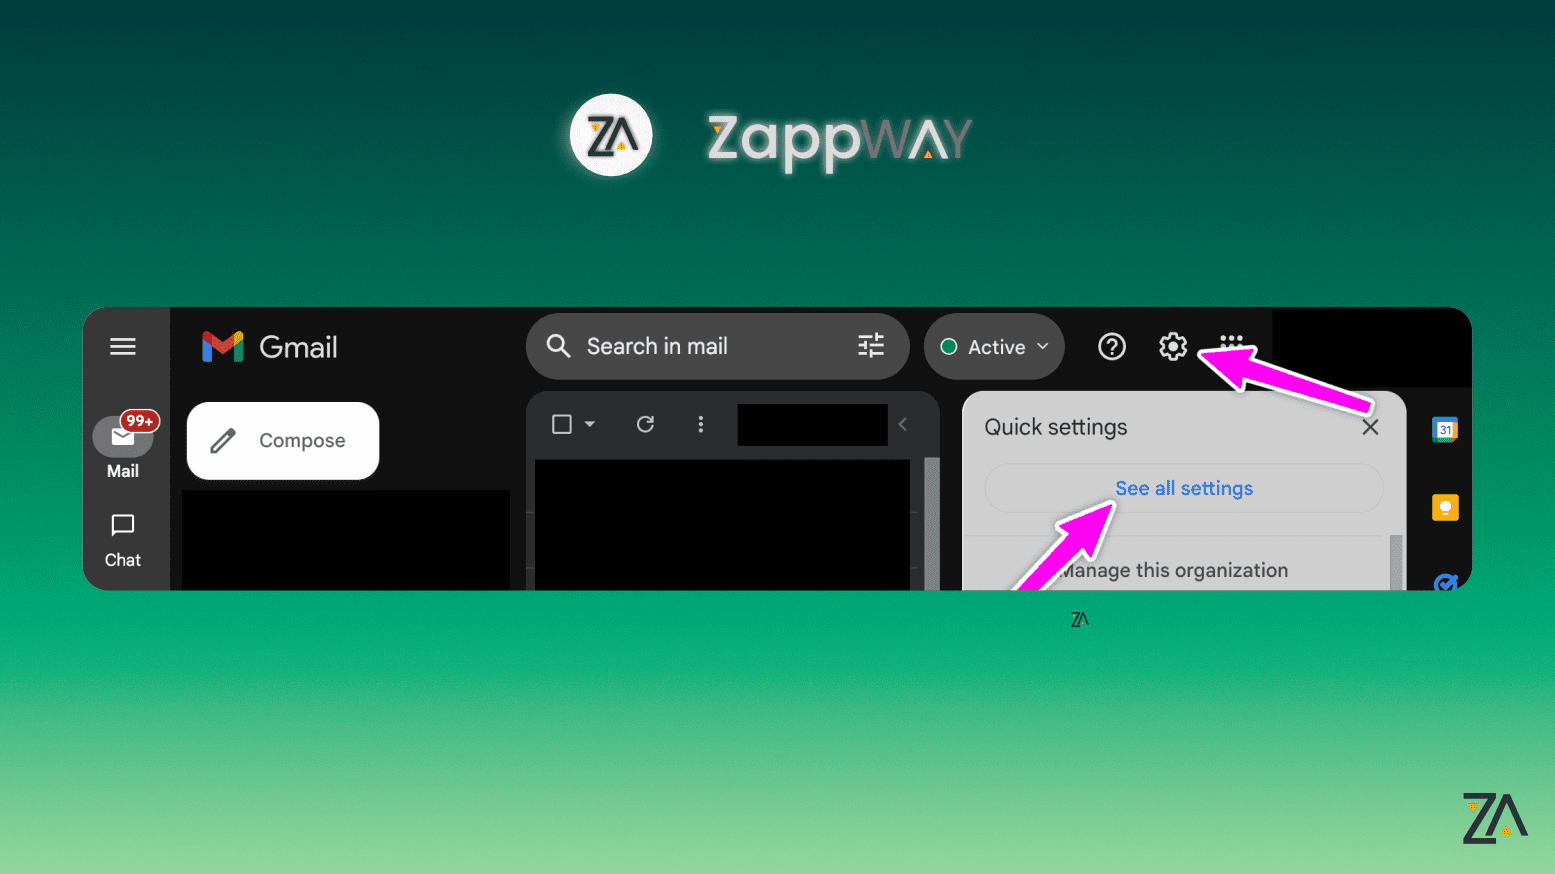
- First, navigate to the email settings by selecting “See all settings” in the top right corner of your email interface.
- Add a Forwarding Address
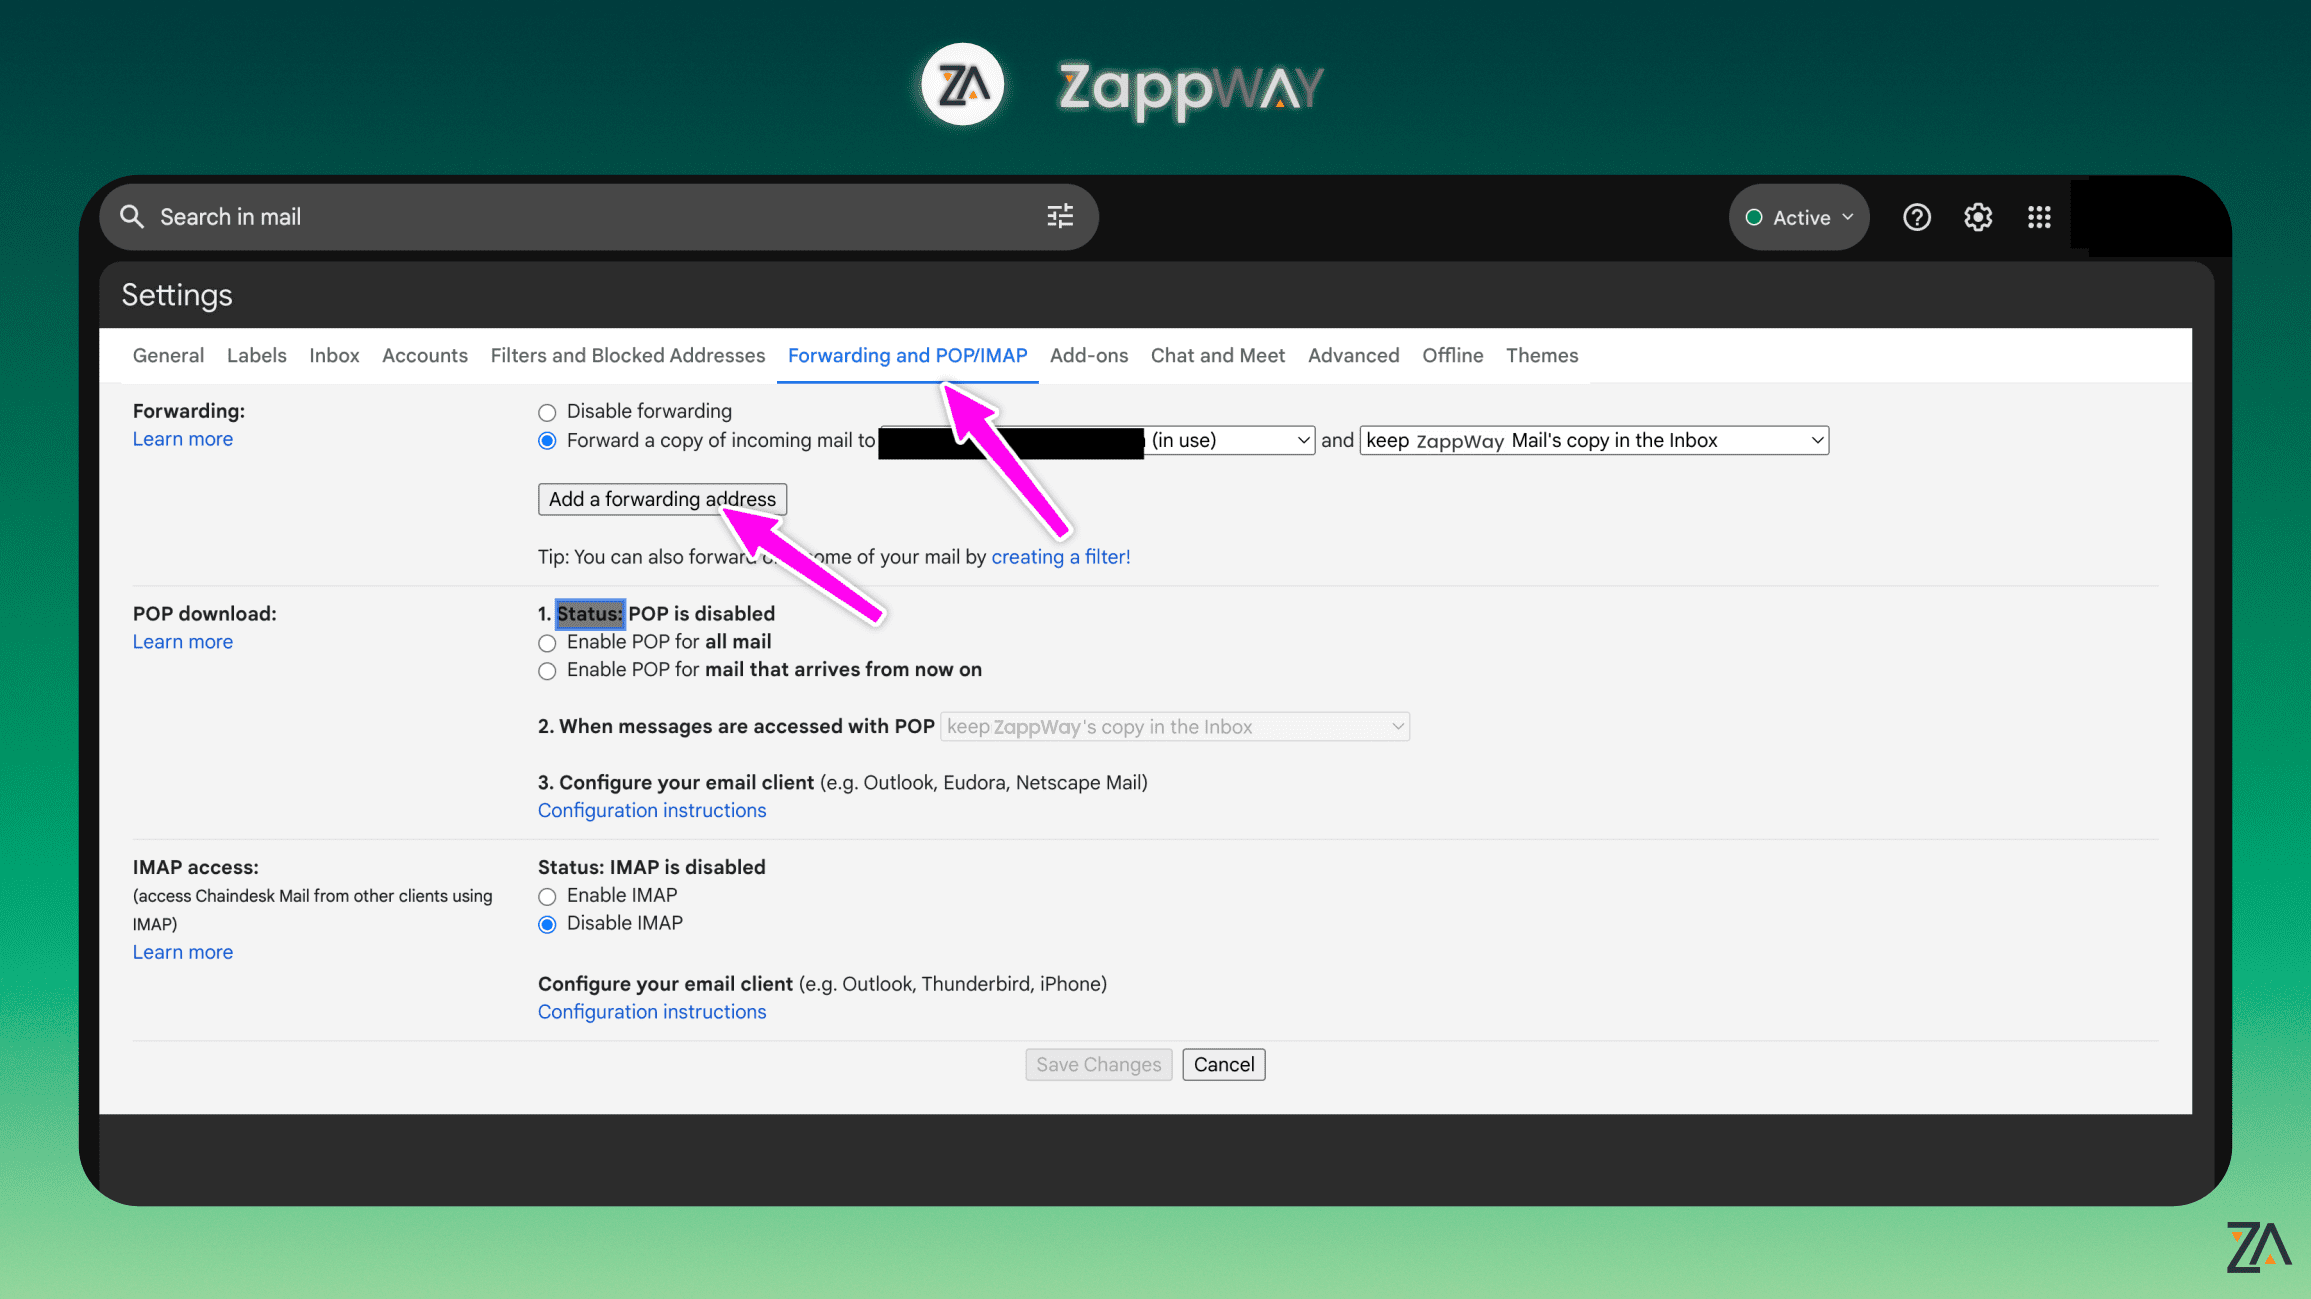
- Go to the “Forwarding and POP/IMAP” tab, then select “Add a forwarding address.”
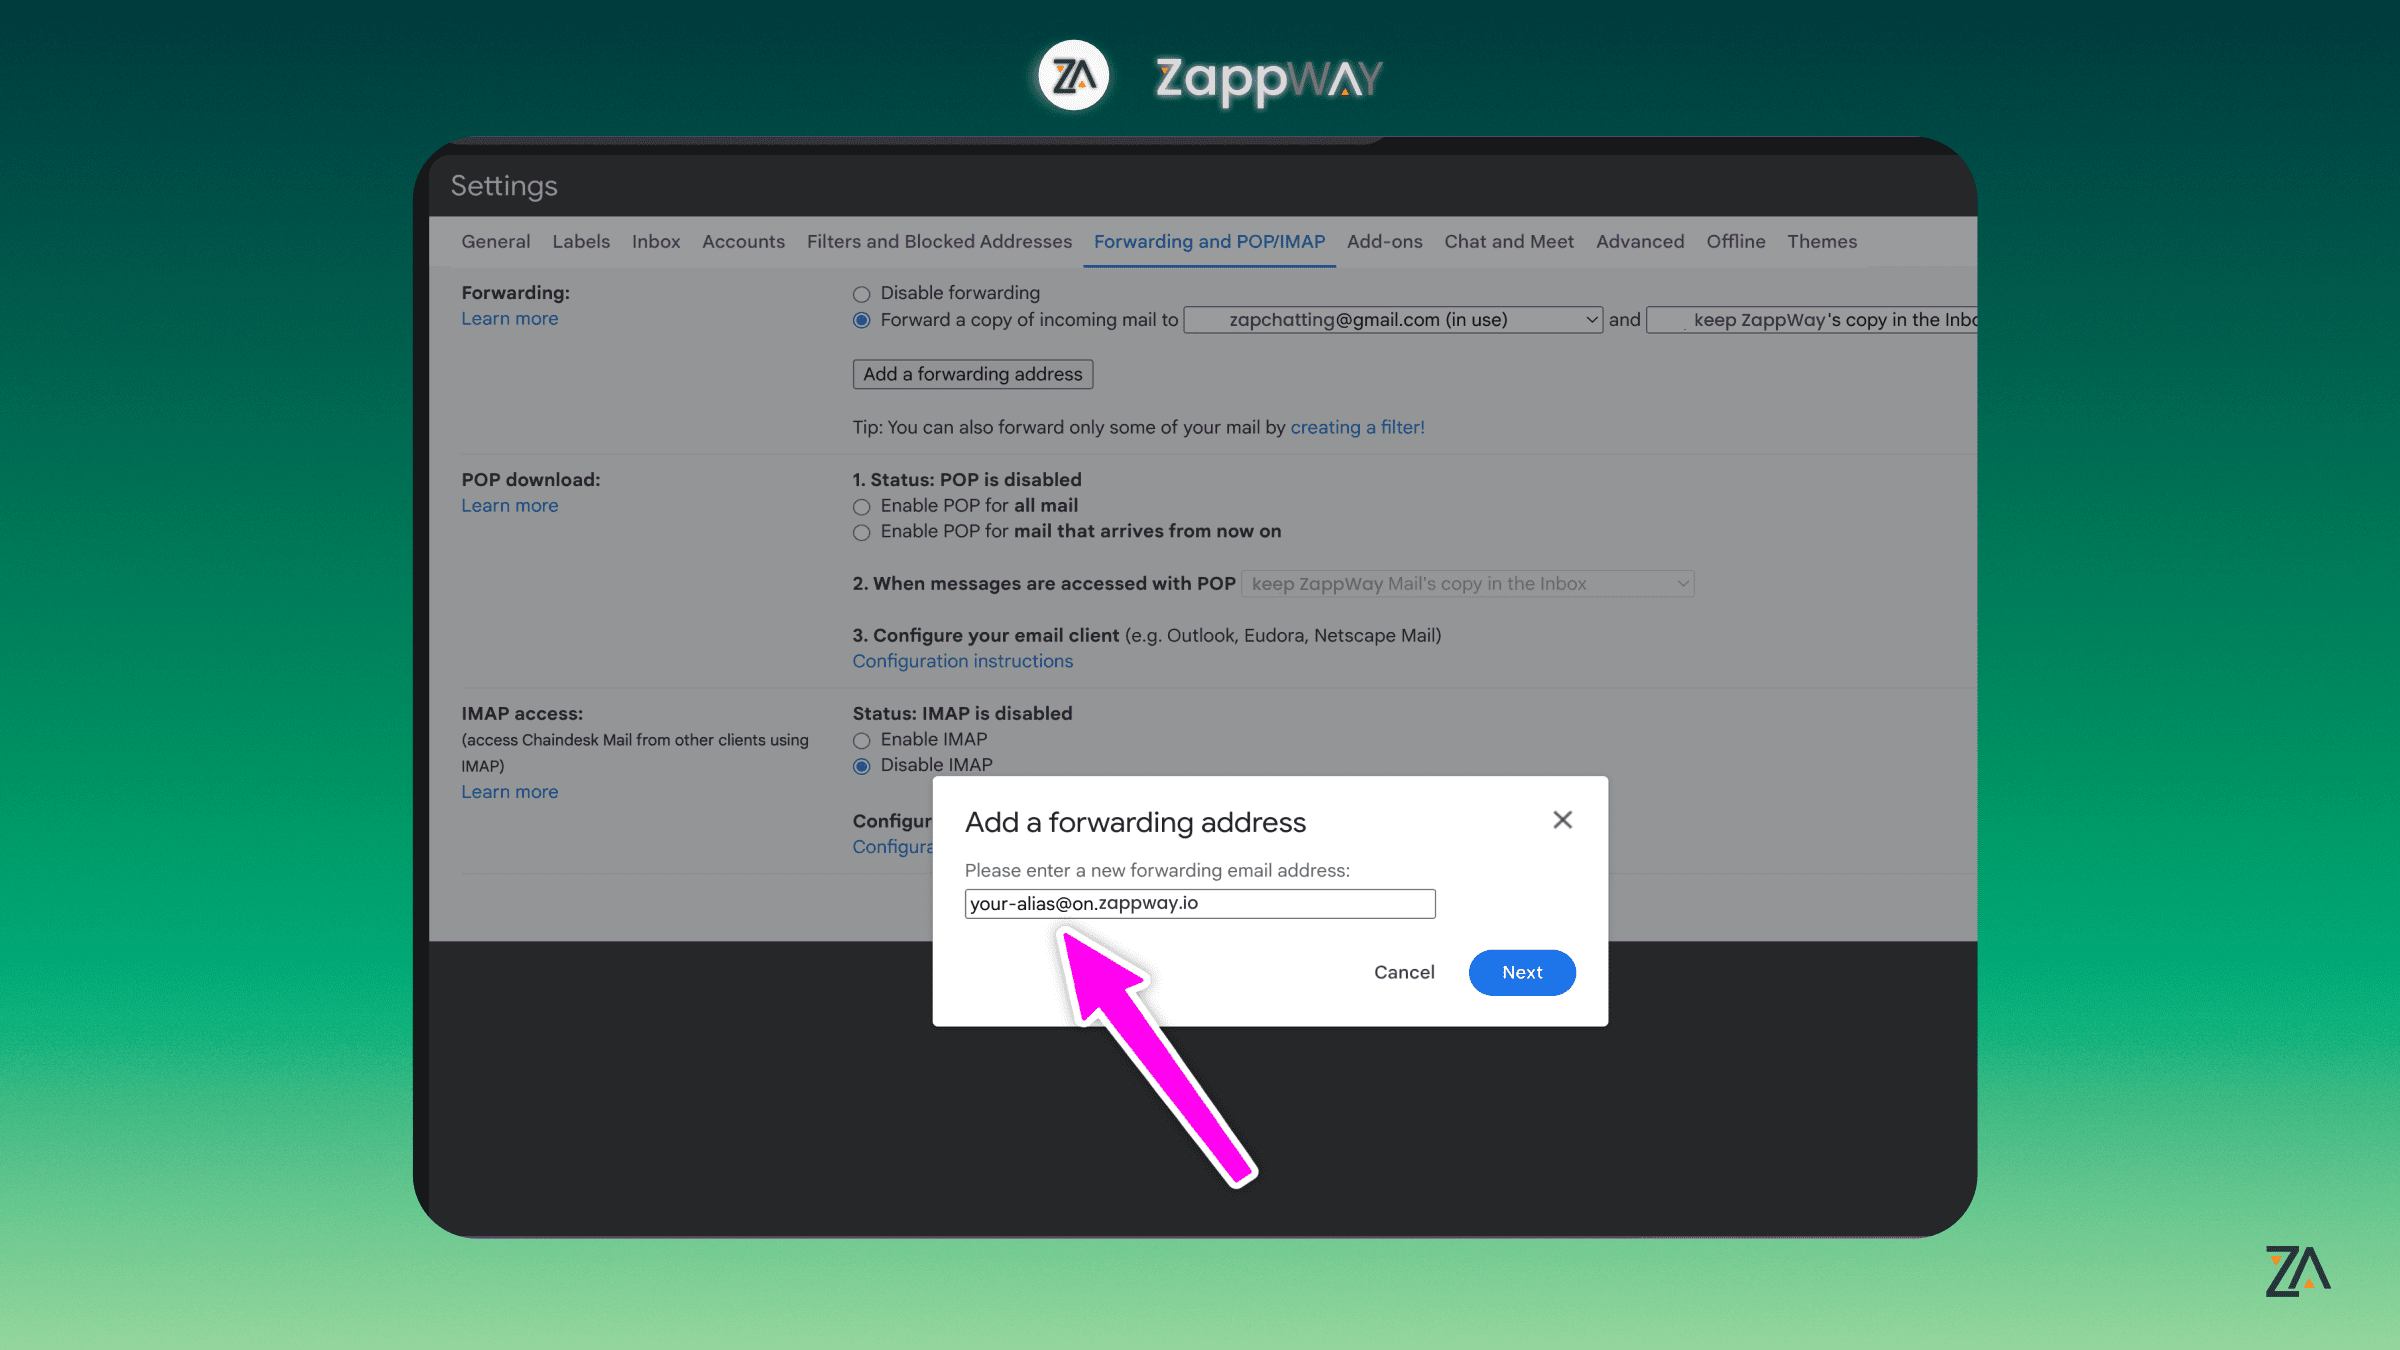
- Input the email address you obtained from the ZappWay Email Inbox settings. Then, proceed with “Next” and confirm by clicking “Proceed.”
- Go to the “Forwarding and POP/IMAP” tab, then select “Add a forwarding address.”
- Verification Process
- Sometimes, a verification email is sent by Gmail to confirm the forwarding address.
- In your ZappWay inbox, locate and open the confirmation email from Gmail. Follow the verification link within this email to complete the process.
- Create an Email Filter
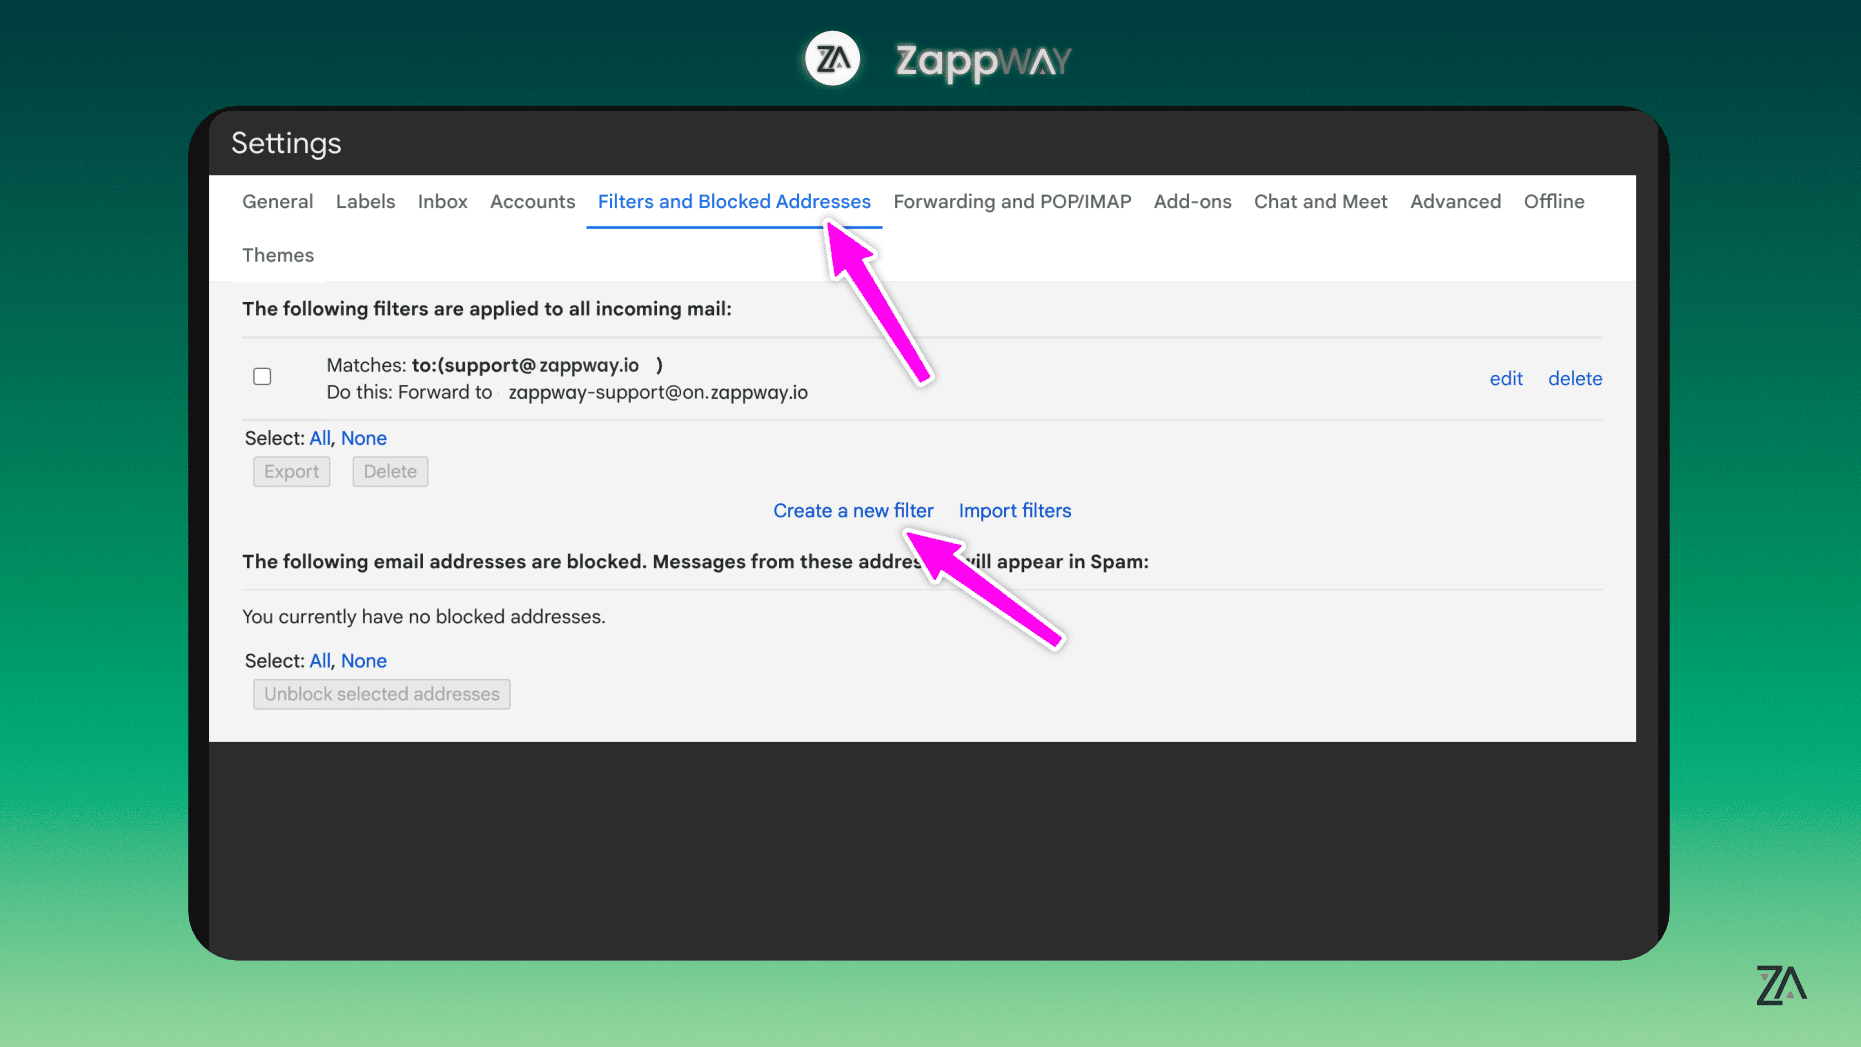
- To ensure all emails are correctly forwarded to ZappWay, you’ll need to set up a filter.
- Again, click “See all settings” in the top right, then navigate to “Filters and Blocked Addresses” and select “Create a new filter.”
- In the filter settings, enter your official support email in the “To” field. If you’ve verified a sender email address with ZappWay, ensure it matches the address you’re inputting here.
- Proceed to “Create filter.”
- Configure Filter Settings
- In the filter options, check the box next to “Forward it to” and choose the forwarding address you previously set up.
- Finalize this step by clicking “Create filter.”

- Completion
- Congratulations! 🥳 You’ve successfully configured your email to forward messages to ZappWay. Your setup is now complete and ready for use.
Setup
Gmail
To configure an email forwarding setup with Gmail, follow these steps: