> ## Documentation Index
> Fetch the complete documentation index at: https://docs.zappway.ai/llms.txt
> Use this file to discover all available pages before exploring further.
# Gmail
To configure an email forwarding setup with Gmail, follow these steps:
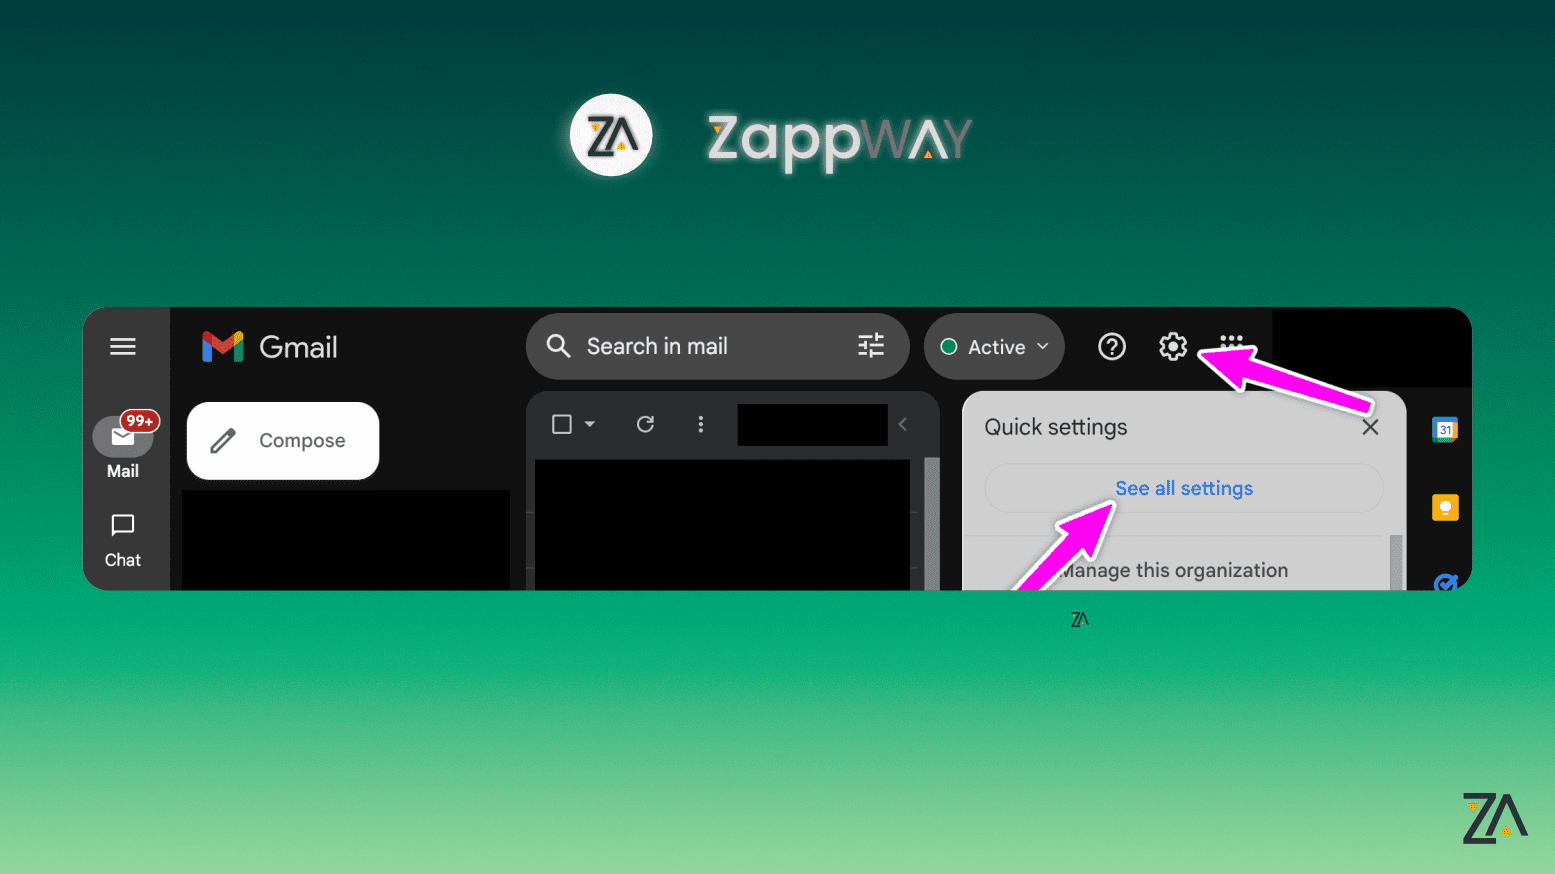
1. **Initiate Email Forwarding Configuration**
* First, navigate to the email settings by selecting "See all settings" in the top right corner of your email interface.
 2. **Add a Forwarding Address**
* Go to the "Forwarding and POP/IMAP" tab, then select "Add a forwarding address."
2. **Add a Forwarding Address**
* Go to the "Forwarding and POP/IMAP" tab, then select "Add a forwarding address."
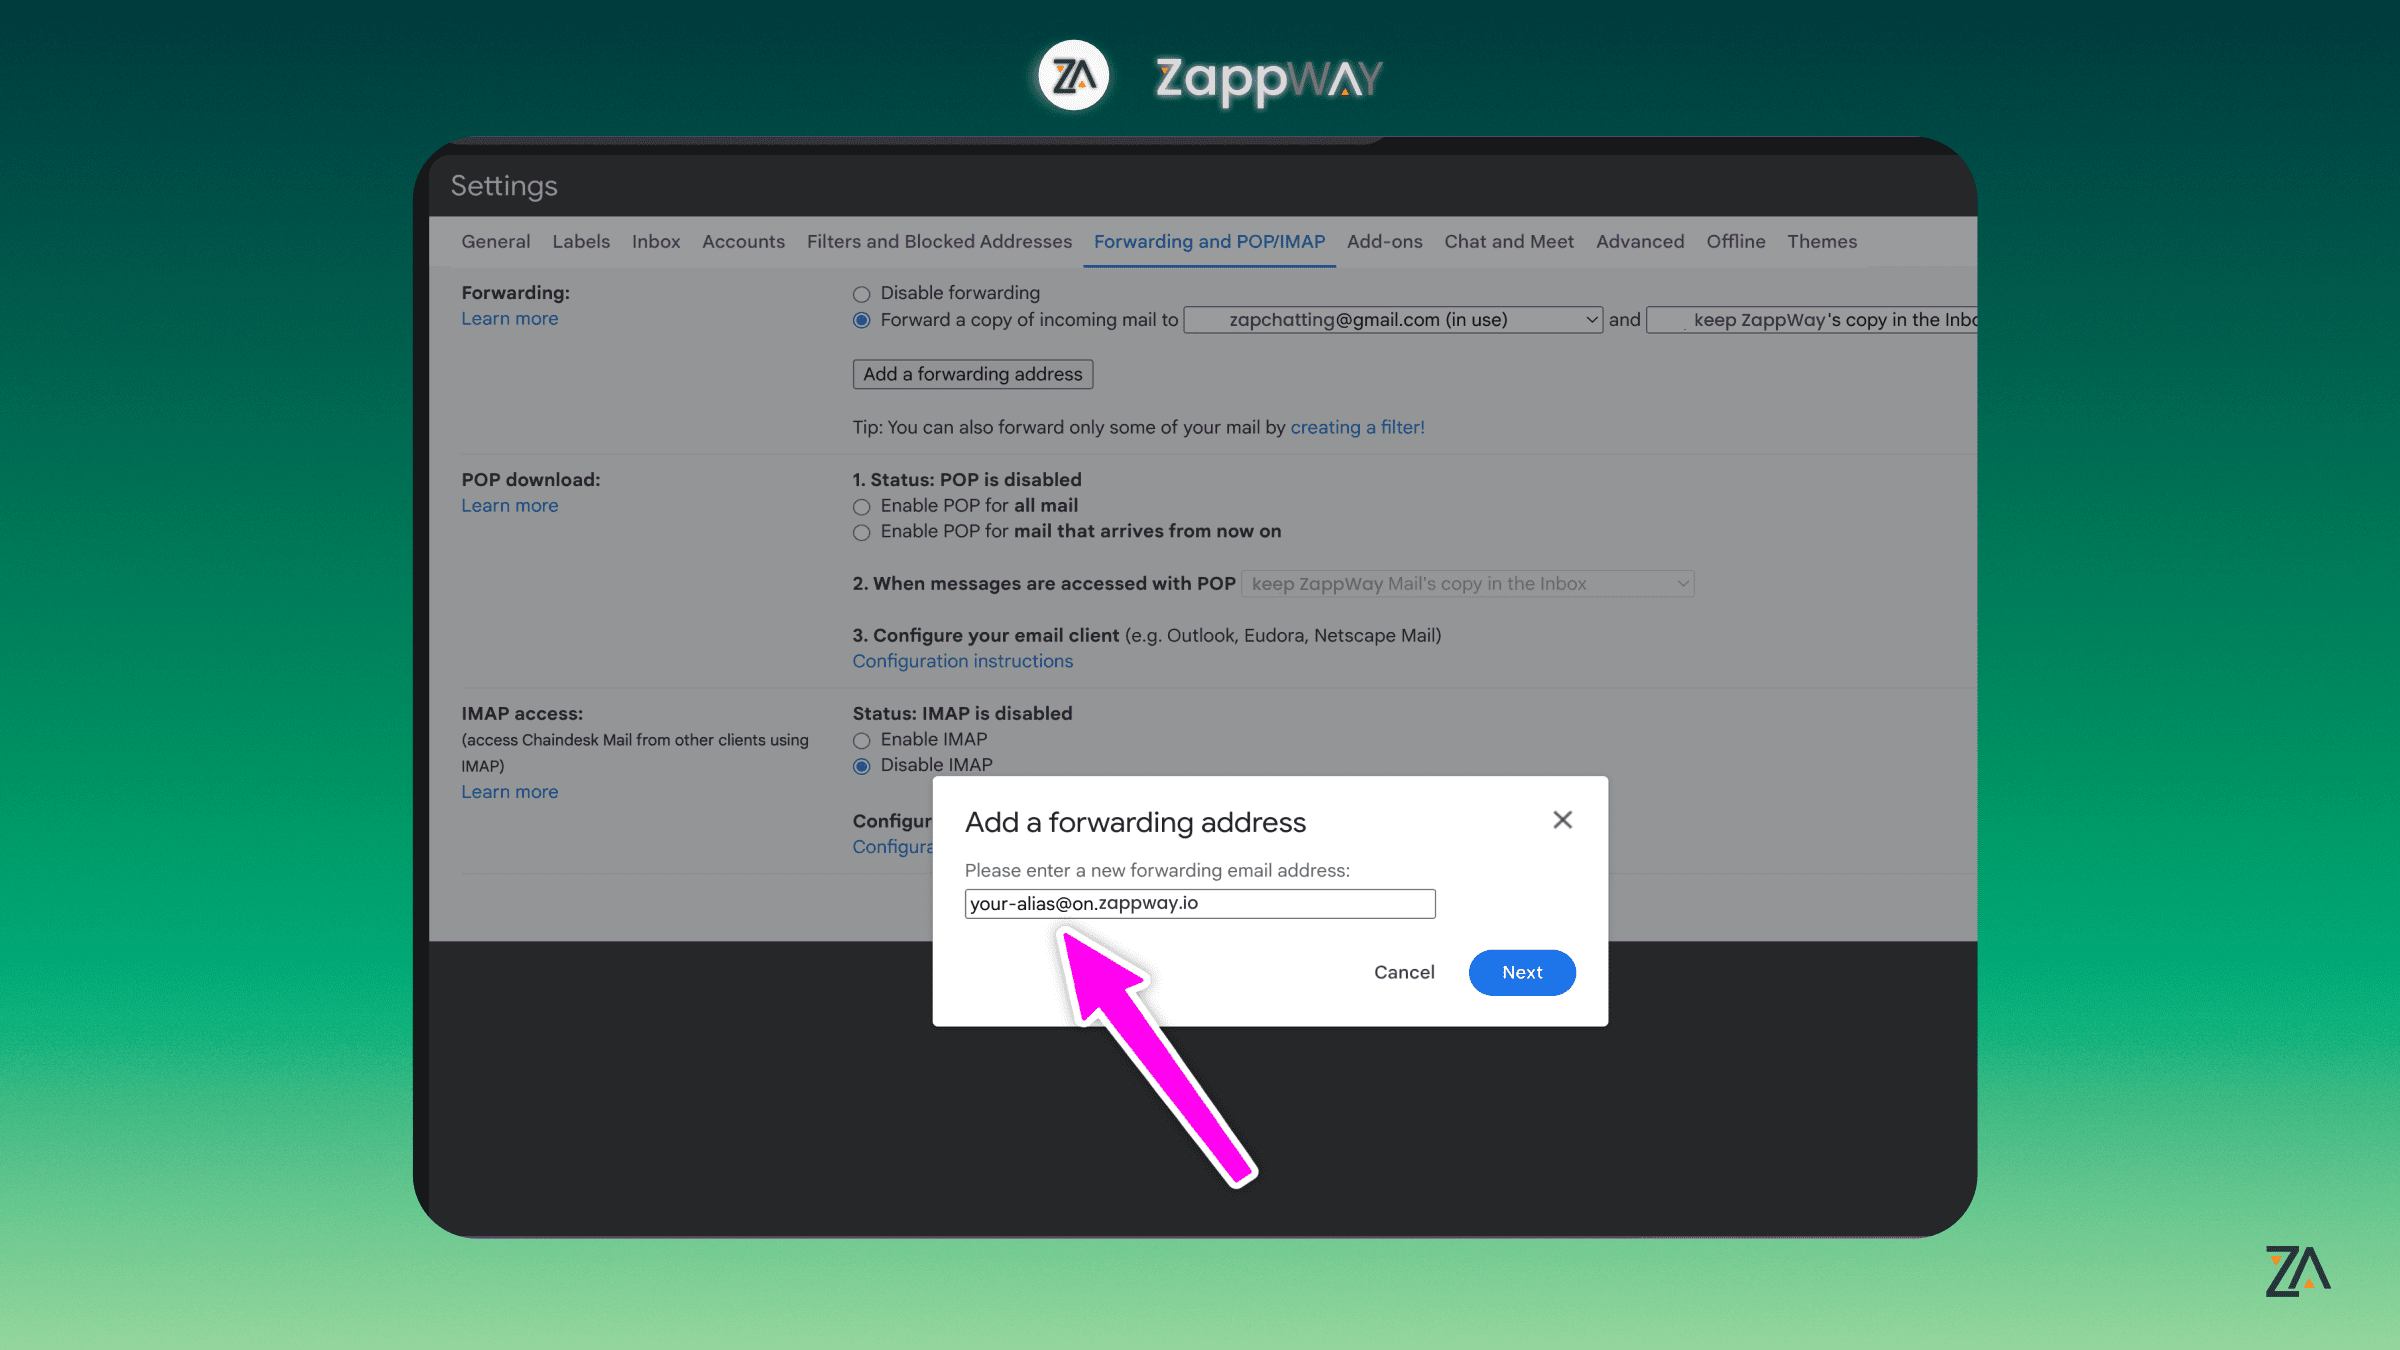
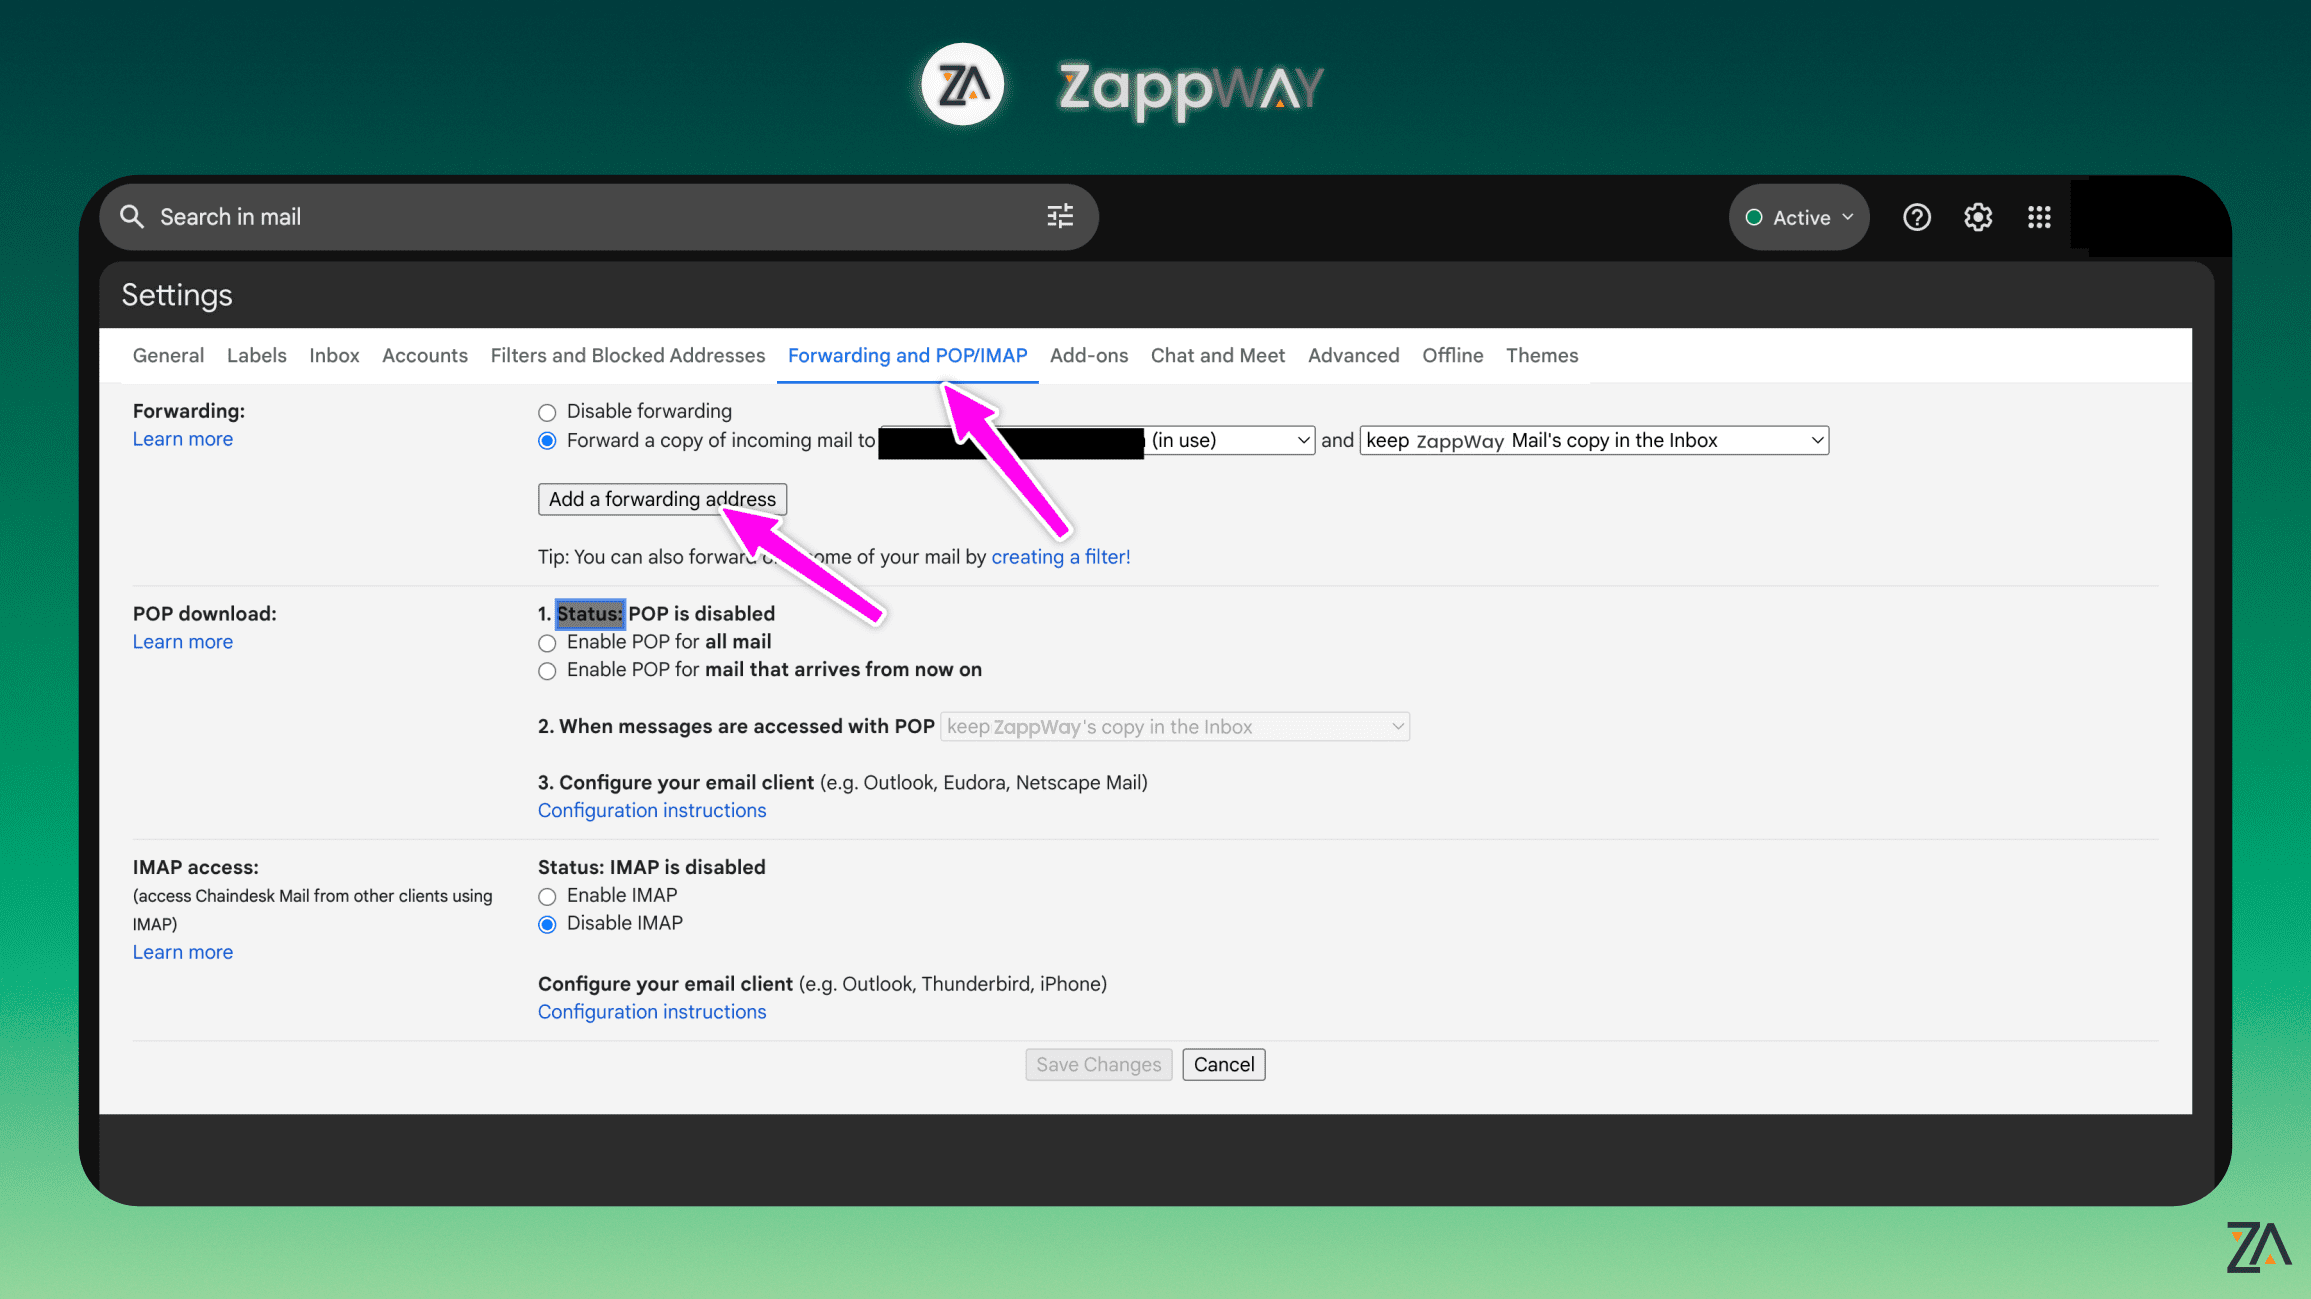 * Input the email address you obtained from the ZappWay Email Inbox settings. Then, proceed with "Next" and confirm by clicking "Proceed."
 3. **Verification Process**
* Sometimes, a verification email is sent by Gmail to confirm the forwarding address.
* In your ZappWay inbox, locate and open the confirmation email from Gmail. Follow the verification link within this email to complete the process.
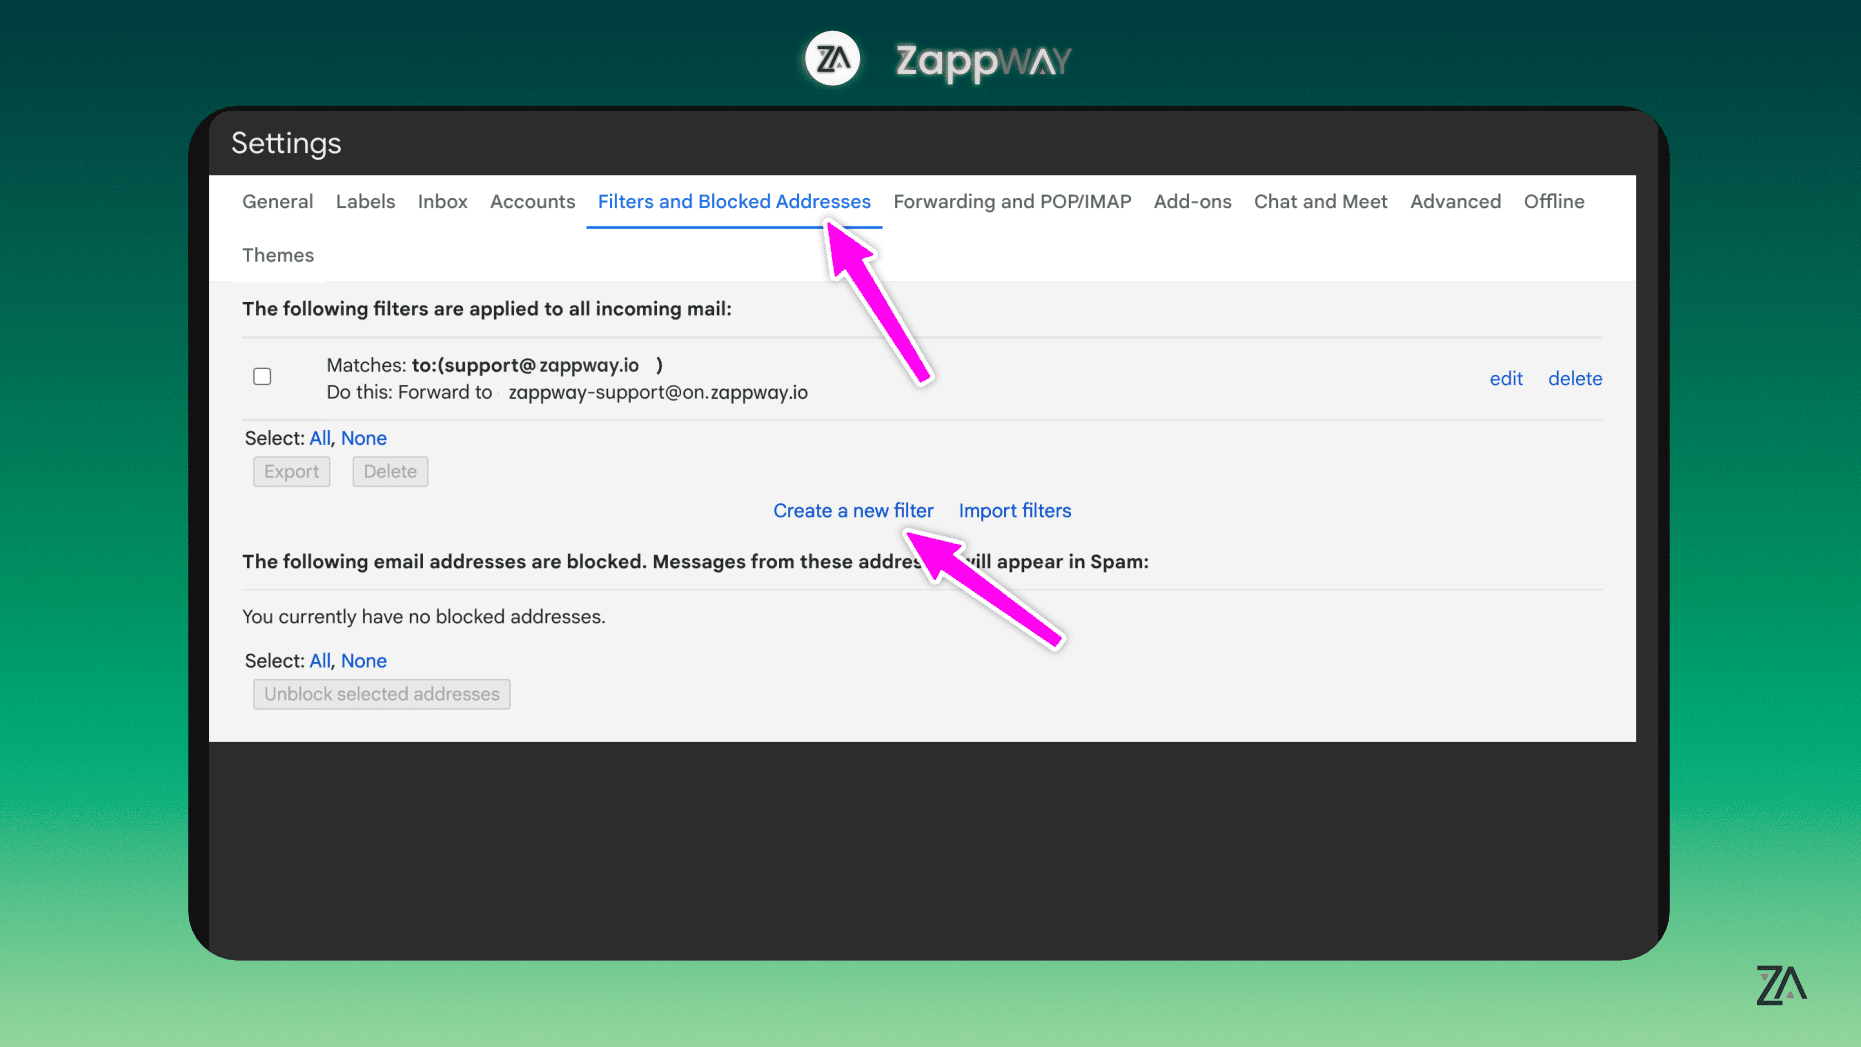
4. **Create an Email Filter**
* To ensure all emails are correctly forwarded to ZappWay, you'll need to set up a filter.
* Again, click "See all settings" in the top right, then navigate to "Filters and Blocked Addresses" and select "Create a new filter."
* In the filter settings, enter your official support email in the "To" field. If you've verified a sender email address with ZappWay, ensure it matches the address you're inputting here.
* Proceed to "Create filter."
3. **Verification Process**
* Sometimes, a verification email is sent by Gmail to confirm the forwarding address.
* In your ZappWay inbox, locate and open the confirmation email from Gmail. Follow the verification link within this email to complete the process.
4. **Create an Email Filter**
* To ensure all emails are correctly forwarded to ZappWay, you'll need to set up a filter.
* Again, click "See all settings" in the top right, then navigate to "Filters and Blocked Addresses" and select "Create a new filter."
* In the filter settings, enter your official support email in the "To" field. If you've verified a sender email address with ZappWay, ensure it matches the address you're inputting here.
* Proceed to "Create filter."
 5. **Configure Filter Settings**
* In the filter options, check the box next to "Forward it to" and choose the forwarding address you previously set up.
* Finalize this step by clicking "Create filter."
5. **Configure Filter Settings**
* In the filter options, check the box next to "Forward it to" and choose the forwarding address you previously set up.
* Finalize this step by clicking "Create filter."
 6. **Completion**
* Congratulations! 🥳 You've successfully configured your email to forward messages to ZappWay. Your setup is now complete and ready for use.
6. **Completion**
* Congratulations! 🥳 You've successfully configured your email to forward messages to ZappWay. Your setup is now complete and ready for use.